Lattice Diamond on Ubuntu 16.04
electronics / linux / fpga / lattice / embedded
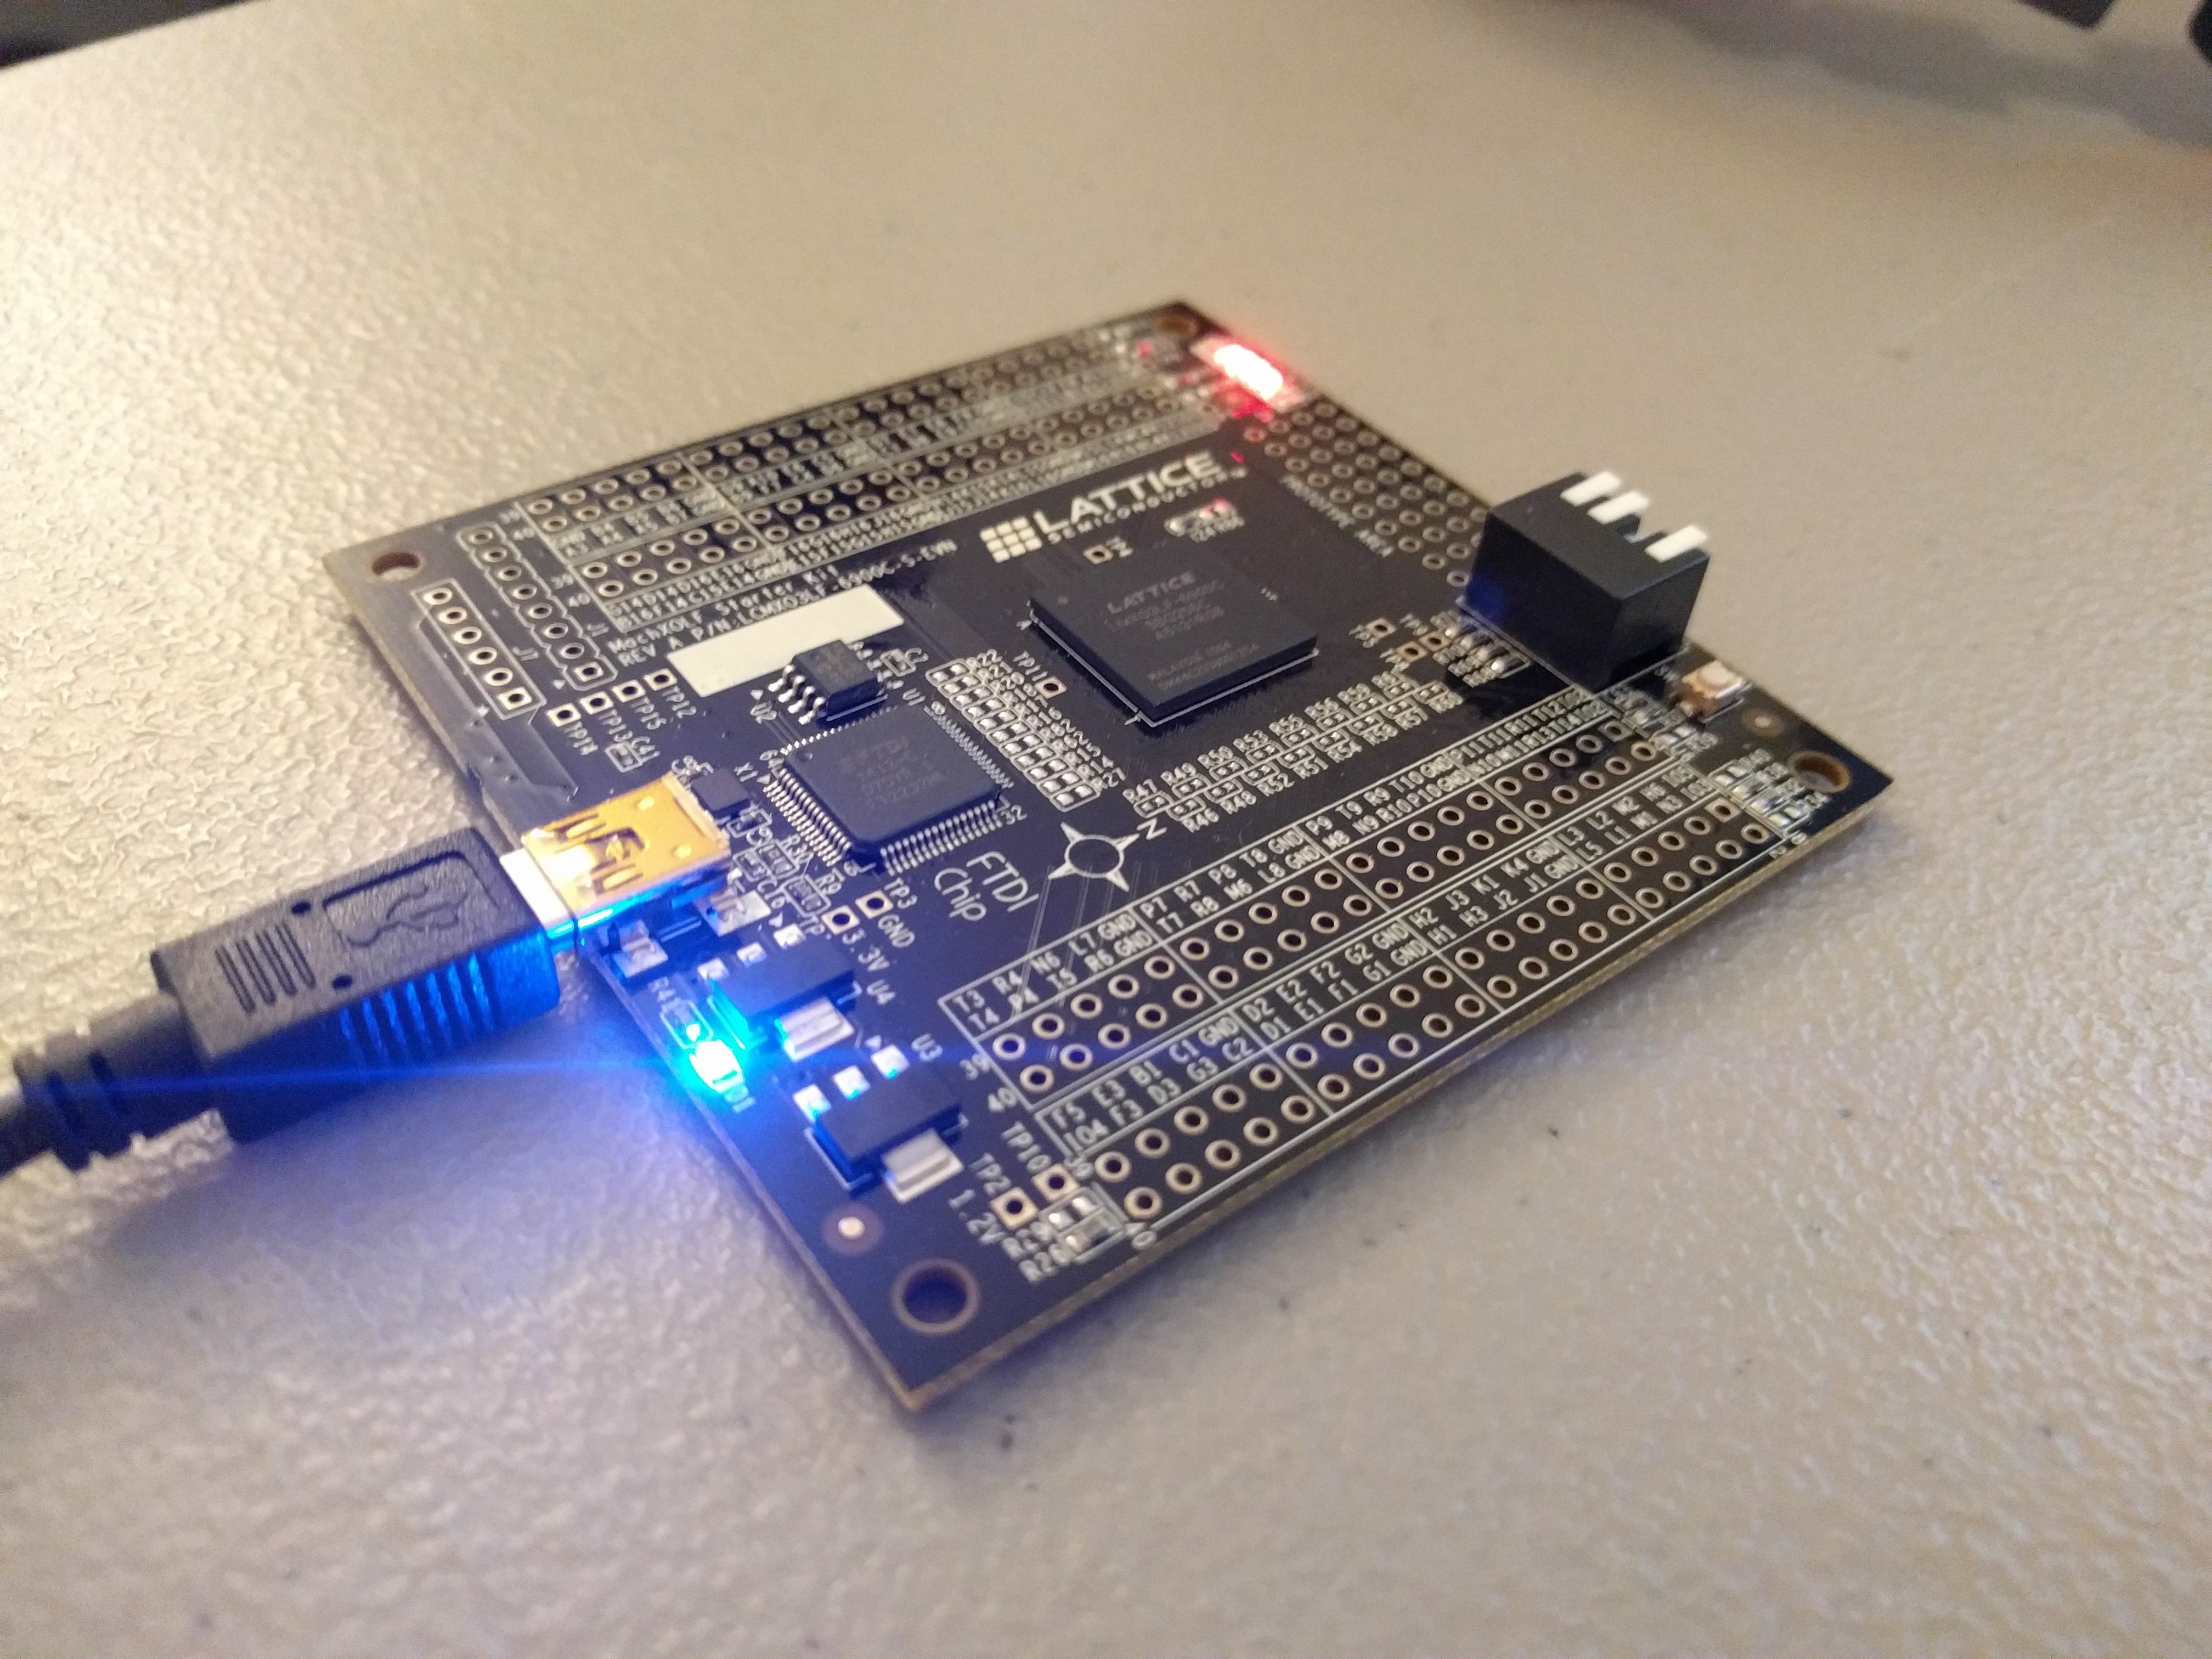
I recently picked up a Lattice MachXO3 starter kit from Mouser-- it's a pretty cheap and convenient board for experimenting with an FPGA, without having a bazillion peripherals attached to it (and it's under $30).
Lattice's design & synthesis software, Lattice Diamond, is available for both Windows and Linux, which is great. However, they only provide an RPM package, with official support for RHEL. This is a pain, but isn't a big issue. Other guides I saw online tried to use alien to repackage the RPM as a deb package, but that seems like a pain, so we can just extract the files and run the post install script manually.
Prerequisites
We will need some RPM tools to work with the provided package, as well as libusb1 for Python 2.7. Ensure those are installed as follows:
sudo apt-get install rpm rpm2cpio
sudo pip install libusb1
Step 1: Acquire the RPM
First, you'll need to sign up for an account on Lattice's website, then you'll be able to download the software here.
Create a directory called diamond, then download the RPM to this directory.
mkdir diamond
Step 2: Extract the RPM, Install Files
In the diamond directory, run the following command to extract the file contents:
rpm2cpio *.rpm | cpio -idmv
Next, we will need the post-install scriptlet from the RPM.
rpm -qp --scripts *.rpm
This command will print all of the scriptlets. Highlight and copy the postinstall section, then open a text editor and paste the contents into a file named postin.sh. Once that's done, make the file executable, and run it:
chmod +x postin.sh
RPM_INSTALL_PREFIX=$PWD/usr/local bash postin.sh
Now, copy the files to the correct location:
sudo cp -Rva --no-preserve=ownership ./usr/local/diamond /usr/local/
The diamond directory we created for the intermediate steps can be removed once installation is complete (optional):
cd ../
rm -Rf diamond
Step 3: Setup udev rules
If you will be using a dev board or programming cable with Diamond, you will need to set up some udev rules to ensure the kernel's ftdi_sio driver doesn't bind to the device. We will also need to ensure correct permissions on the devices (NOTE: If Diamond or Programmer start with your device plugged in, but are unable to access the device due to permissions issues, they will segfault! Yay...).
Create a file called /etc/udev/rules.d/10-lattice.rules with the following contents (adjust as necessary). You'll need to be root, or use sudo to create this file:
ATTRS{idVendor}=="0403", ATTRS{idProduct}=="6010", MODE="0666", SYMLINK+="ftdi-%n", RUN+="/bin/sh -c 'basename $(dirname $(realpath /sys%p/device)) > /sys/bus/usb/drivers/ftdi_sio/unbind'",RUN+="/root/ftdi_fixer.py"
The vendor and product ID can be determined by running lsusb with your device plugged in to your machine.
The above entry runs a couple of commands whenever your device is plugged in. The first is to unbind the device from the ftdi_sio kernel driver. The second is a Python script (introduced shortly), which will properly fix the device entry permissions, since udev fails to do this correctly (it is likely I am doing something wrong, but at least this works).
The script /root/ftdi_fixer.py can be viewed here. This is a short script I wrote (which utilizes libusb1 we installed earlier) to fix the device entry permissions.
sudo curl https://ycc.io/scripts/ftdi_fixer.py -o/root/ftdi_fixer.py
sudo chmod +x /root/ftdi_fixer.py
Now that everything is in place, be sure to unplug your cable (if it's plugged in), then reload the udev rules:
sudo udevadm control --reload
Now plugging in your cable, you should see entries like the following in syslog or dmesg:
[3117880.476085] ftdi_sio ttyUSB1: FTDI USB Serial Device converter now disconnected from ttyUSB1
[3117880.476109] ftdi_sio 3-14:1.1: device disconnected
[3117881.483165] ftdi_sio ttyUSB0: FTDI USB Serial Device converter now disconnected from ttyUSB0
[3117881.483193] ftdi_sio 3-14:1.0: device disconnected
This means that the device was disconnected from the driver (which is what we want). Be sure to check /var/log/syslog for execution errors for the ftdi_fixer.py script if you encounter problems.
Conclusion
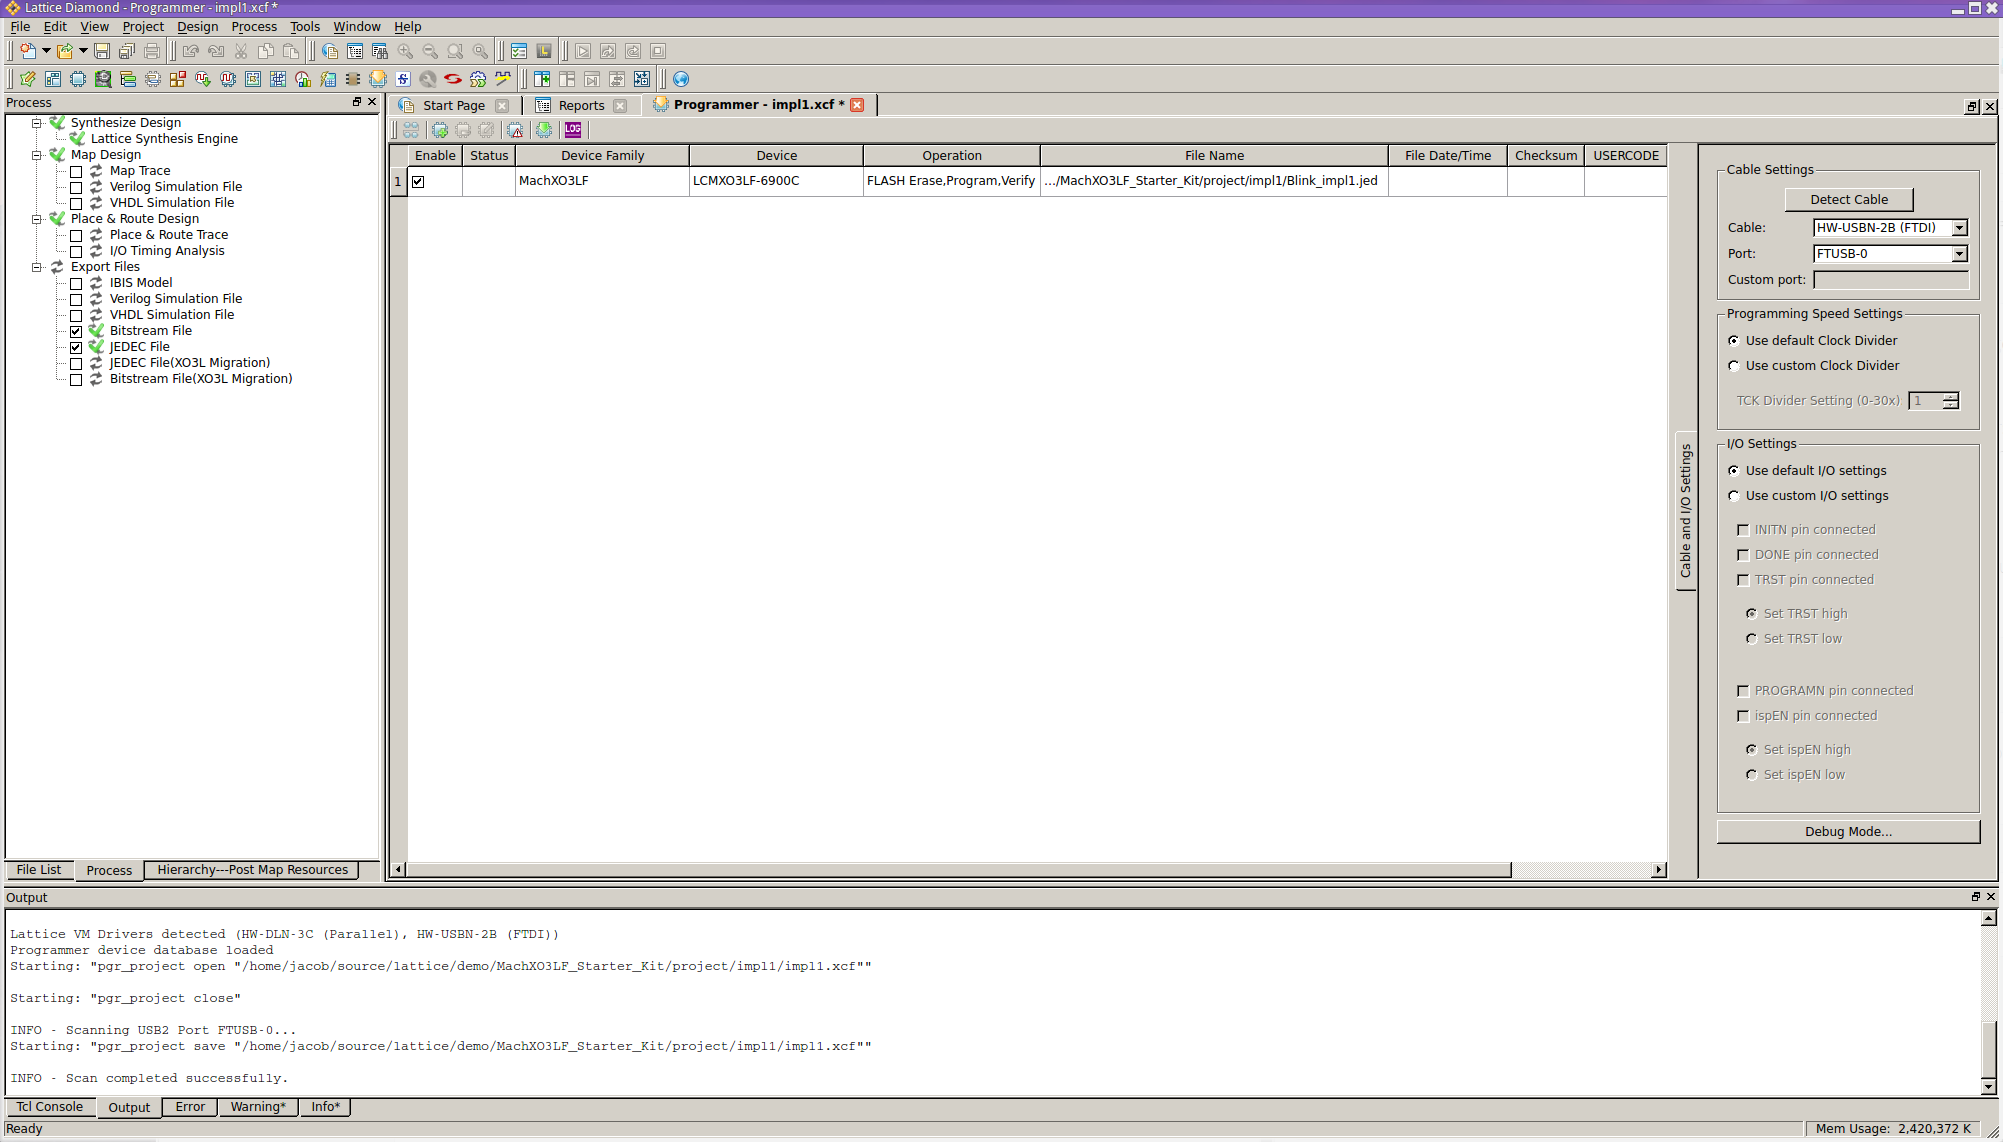
Now that the device is connected and ready-to-go, you should be able to access the adapter from within Lattice Diamond or Lattice Programmer (formerly called ispVM).
Notes
- Cable/adapter detection, JTAG chain scanning, and Flash programming are super slow on Linux. While troubleshooting problems initially, I noticed that the Lattice software re-enumerates and checks every single USB device prior to starting any of these operations.
- The MachXO3 Starter Kit, as well as many other Lattice dev & starter boards, feature an FTDI FT2232H. This is common on many recent programming cables, as it allows using the MPSSE interface for banging out JTAG-- and FTDI even have an example that features JTAG (see previous link). The Lattice tools use the ftd2xx-mpsse driver on Linux. However, I was not able to get urJTAG to communicate with the board using its generic FT2232 cable type and matching settings.
- Using an FTDI MPSSE cable (Mouser, Amazon, Digikey) might work as an in-circuit JTAG programmer without any modification (as long as the VID/PID are
0x0403/0x6010, I believe this should work without any issues). Need to buy one and actually test this.